Epoxy resin is such a versatile product that it can be used for a variety of projects. Use a dryer to heat the added layer, after which you can sand again. When these 2 parts are mixed together with a 1:1 ratio, a chemical reaction occurs and liquid mixture hardens into a hard as rock mixture - solid plastic. Answers. Wooden sticks, plastic or wooden spatulas are great for mixing small amounts of resin. This article has been viewed 71,180 times. It doesn't matter how you pour the epoxy on the wood during the first layer, just as long as it covers the whole piece of wood. By using this service, some information may be shared with YouTube. We always recommend to wear a respirator or mask, nitrile gloves and work in a well ventiliated area to avoid contact with the fluid. This can be attempted about 48 hours after the first coat since the epoxy resin has not hardened completely, the second layer can easily bond with it. Tip: trywet sanding method produces slighty finer sanding pattern and it is more effective way to sand. The exposed wood also needs to be treated to protect it from liquids. When applying a deep pour, remember it takes time to fully cure. If you see more air bubbles within the first 30 minutes, use your desired heat source to pop them if possible. First, discover what the problem is. When it comes to deep areas and you want to make sure the filler is getting everywhere, you can use an additional piece of wood. wikiHow, Inc. is the copyright holder of this image under U.S. and international copyright laws. For a thin layer, you can try adding consolidant to the area first and then filler to reach the correct thickness. The most common epoxy resin ratio is 1:1, it's easy to workwith but remember epoxy resin must be mixed correctly and properly. This is a great technique to enhance the wood grain and allows the beauty of the wood, Read More How to Whitewash Wood A Guide on Different White Wash TechniquesContinue, There are loads of wood species for us to choose from these days, thanks to how quickly were able to transport things from one end of the world to the other. The manufacturer's mixing instructions are veryimportant to making sure you achieve the best results. Every year you should check your repairs to see if anything needs to be redone. First, the surface should be thoroughly cleaned and allowed to dry completely. This image may not be used by other entities without the express written consent of wikiHow, Inc.
\n<\/p>
\n<\/p><\/div>"}, https://www.bobvila.com/articles/sanding-wood/, https://www.youtube.com/watch?v=qQrRVUarzPc#t=15s, https://www.youtube.com/watch?v=qQrRVUarzPc#t=51s, https://www.youtube.com/watch?v=qQrRVUarzPc#t=43s, http://www.coatingspromag.com/articles/safety/2016/11/working-safely-with-epoxy-coatings, https://www.youtube.com/watch?v=qQrRVUarzPc#t=57s, https://www.youtube.com/watch?v=qQrRVUarzPc#t=1m37s, https://www.youtube.com/watch?v=qQrRVUarzPc#t=2m12s, https://www.youtube.com/watch?v=qQrRVUarzPc#t=2m23s, https://www.youtube.com/watch?v=3OXCywR-Smk#t=5m20s, https://www.youtube.com/watch?v=3OXCywR-Smk#t=6m35s, https://www.youtube.com/watch?v=3OXCywR-Smk#t=7m23s, https://www.youtube.com/watch?v=qQrRVUarzPc#t=5m44s. Use a couple of layers of cardboard or plastic, just in case.
Wooden furniture is attractive and durable and can remain so if unused. It's very easy to fix this problem, just apply another coat of paint. The hardness of resin can vary, from soft to hard. Go over the surface with a blow dryer to remove any bubbles, then let the epoxy sit for 4 hours. Baltic Day pigments are specially formulated for Resin Art. So, if you want to use epoxy resin in outdoor applications, you will need to get a UV resistant resin. This should enable you to begin your wood and resin projects. Make sure to get rid of any oily or greasy marks, as this can affect the application of resin. Wood is something that reacts to humidity, causing it to either swell with increase moisture or shrink slightly in dry conditions. I get the feeling this may be a typo? Fine stress marks and a lof gloss in the epoxy may still be obtained by sanding.
Material that cannot properly catalyze will remain sticky/tacky and uncured. This type of casting mold does require experience. To attain excellent adhesion to the wood, you need to consider a few things. Resin is oxidizing bottles which are not closed will exposure to oxygen in the air - will cause yellowing process. Sandpaper by hand smaller items and for bigger projects, make use of an electric sander. The best tip to speed up the cure time is to increase the working/room temperature. Completely hardened surface sanding and polishing becomes more difficult.. There are many choices for color, each material providing their own properties. The repair can be easily conducted with new materials and eliminating the main reasons why this happened. Allow everything to dry completely, after a couple of days, you can add more coats until you notice the oil is not absorbing anymore.
Most color stains are fine to work with, but to avoid damaging your wood piece rather do a small test first. Metallic Resin Dye will create gorgeous rippled metallic and shimmery effects in river tables, wooden boards, counter tops, floors, castings, coatings and much much more! Create deep metallic and shimmer effects in casting and coating epoxies. If you removed to much of epoxy resin mixture, you can add a second layer of coat. Using a mixing board, mix the two parts thoroughly. The ratios will be labeled on the package and are often either 1:1, 2:1, or 4:1. However, it can be quickly marred and damaged by things like hot items being placed onto it. This image is not<\/b> licensed under the Creative Commons license applied to text content and some other images posted to the wikiHow website. If material will not be blended enough, it will not cure completely. Test out the epoxy to see how hard it is, as long as it does not dent, you can begin sanding. You can use epoxy resin for sealing in the following cases: When working with epoxy resin, your workspace is vital for the best epoxy coating results. The resin cures glossy and clear with a professional look. Adding to Much Hardener to Speed Up Curing Time. At Press Play we deliver intelligent solutions that simplify the process for businesses to stay in step with the dynamically changing technology landscape. Make sure your mixing items and board are cleaned properly. Squeeze the filler into the broken wood areas, use a bit of force to bond epoxy resin and wood. The temperature must be around 23 C. First, always dry the wood properly.
This extremely viscous casting resin comes in a 2-part three quarter gallon kit. Applications are endless: 1. 6. Also, you might want to place a metal sheet between the old and new wood. You have the product ready and you have drilled the holes into the wood, next apply the consolidant into the holes. Wood epoxy is perfect for those wood items that are subjected to certain stressors and moisture. From identification to implementation, Play Projects is the ideal partner to plan, manage and/or execute your projects. When using additional wood, make certain the wood is similar to the wood you are repairing, and the grains should also align correctly. senses. Otherwise, some hard wood wax will do the job on the resin and wood. You can pour it to a thickness of 2 to 4 inches and is the best resin for castings, river tables, live edges amongst other applications.
Just thought Id double check. You can also use a brush to make sure everything is covered, keep doing this until the wood is saturated. If you are doing a job outside, it is, therefore, suggested it is done in the shade to keep things cooler. This is what is written: You can check the video below. BUY BALTIC DAY PIGMENTS HERE. It will easily help you to repair and seal holes and cracks in damaged wooden surfaces. The cured resin does not requires further treatment.  Stuff the epoxy filler into the wood using your putty knife. Mix very well and properly for atleast 4-7 minutes. Make sure to have separate sticks for everything. It takes a lot of stress when you discover that your working wood has been rotted. When working with wood you get many different kinds, some with knots or cracks which provides a certain uniqueness. Then, rest the wood on something so it's elevated, like two upside-down cups, and prepare your epoxy per the instructions. Wipe off any excess epoxy from the sides using the foam brush. If you find your wood to be oily, you can simply apply some acetone. Learn which products can be cast at what thickness and also what quantity you can use. Final Step Polishing and Oiling your Project. Project 3: Resin Casting with Wood Epoxy Casting. So, great for river tabletops, bar tops, glass items, tumblers, a variety of craft projects and repair jobs at home. When is the perfect time to sand? It is not cheap and costs time, it's worthwile to use a highest quality products from beginning. Remember, always follow the manufacturers instructions and mixing ratio for best results. Some factors to consider for your wood and resin projects: The crystal-clear epoxy resin is a popular and common choice, but it does yellow over time. For large objects use a polishing machine. Wouldnt completely hardened surfaces be the least difficult to sand and polish?
Epoxy resin can also be used on countertops and floors. For the best results, you can also add some resin paste. Before working with epoxy resin, you should put your resin box into room temperature for atleast 24 hours and then start working. Our expertise is founded upon the core principles of learning, however, our promise to deliver is founded squarely upon our achievements. You also do not want to sand any other areas that do not need it, which is why this step needs accuracy and persistence. You must be aware what kind of application to use. There are wooden items you use extensively every day, however, and these are often prone, Read More How to Remove Heat Stains from Wood Eradicating Heat Marks on WoodContinue, A patch or two of mold in the back of your closet may look harmless. When busy, use the wet sanding technique, as it is more effective and creates less dust. BALTIC DAY resin powders can also be combined with other brands tinting pigments to add some sparkle to tinted resin. At times when the surface you are working on needs to be flat, for example, a table, and you want to keep these blemishes, you can use epoxy resin to fill up the cracks. After resin is poured and spread around the surface, the bubbles may appear. These are screwed together and then silicone is used to seal it. This might take some time but is an essential step as you do not want any lingering moisture to spoil anything further. Find yourself working on a vertical incline? Once the mixture begins to level, bubbles may appear. Epoxy filler is a solvent-free plastic filler that can be used as wood filler, concrete, GRP filler or plastic filler. Sometimes a hole goes straight through. Subject to the type of product, the mixture will stay a liquid for a while. Once done, whatever you are working on can be placed back in the sun to hasten the curing time. Pour some epoxy, starting in the center of the wood, and use a foam brush to spread it out over the whole surface. 4. Pour the epoxy resin over the surface and spread it over the entire wooden surface with plastic spreader. Keep moving the torch around, this prevents one spot from becoming too hot. Pour the epoxy onto the wood as soon as you mix it because it doesnt have a lot of time before it starts to harden. After curing process, there can be a difference in the hardness of surface. Always be sure you are working in a well ventilated area, wear gloves, eye glasses, a mask or respirator to counter the fumes. Ideal for outdoor applications or any furniture. Two components, a hardener, and the resin, when combined form a solid surface. It also depends on a number of different factors such as the type of resin and hardener, heat and the temperature of the substrate, ambient temperature. Air bubbles rise to the surface and burst until heat is applied. The best epoxy resin for sealing wood is known as laminating resins.  Mix multiple mica metallicflakes into an epoxy, urethane or polyester coating then apply to your projects! Step 5: Shape and Modify the Filler Shape. There are 4 different Ratio Resins: 1:1 ratio ; 2:1 ratio ; 3:1 ratio ; 4:1 ratio. Remove these parts or secure with an epoxy consolidant. In this case, you should be making smaller quantities of epoxy resin instead of one large amount. We recommend to use Epoxy for working on rotted wood: Determine why the wood was rotting and fix it otherwise the problem might return. Silicone Molds, which are easily available and come in a variety of shapes and sizes. If you are not able to figure how to fix riddled with rot wood, then use this simple technique. Large surfaces: River tables, countertops, floors, boards use an orbital sander or eccentric sander. Items like tabletops or cutting boards, for this you need a more resistant resin. Baltic Day resin contains a highest-quality UV filter that protects your cured art work from UV radiation and yellowing. Metallic Resin Dye will create gorgeous rippled metallic and shimmery effects in river tables, wooden boards, counter tops, floors, castings, coatings and much much more! However each colorant has advantages and disadvantages. References If you are looking for an idea for your next resin DIY project, then there is a best place to find your next woodworking idea! If you need to add a second layer, wait until it is just beginning to harden and a little sticky. The wood epoxy will waterproof the wood it covers. 2. You can also create amazing design tabletops by molding the resin into the wood. First, clean up any dust or pieces of loose wood. Should you Seal Wood before Adding your Wood Epoxy?
wikiHow is where trusted research and expert knowledge come together. The wood surface should be prepared thoroughly before coating with epoxy resin. The mixture needs to blend evenly, so you might have to pour again. Make sure to remove the scratches made by the rough sandpaper. It does the job in a very short time and results are way more better than polishing with hands. hELLO!!!! Once you calculated and mixed mixture correctly, squeeze it into the wood holes and voids for the repair purposes. This image may not be used by other entities without the express written consent of wikiHow, Inc.
\n<\/p>
\n<\/p><\/div>"}, {"smallUrl":"https:\/\/www.wikihow.com\/images\/thumb\/a\/ad\/Apply-Epoxy-on-Wood-Step-6.jpg\/v4-460px-Apply-Epoxy-on-Wood-Step-6.jpg","bigUrl":"\/images\/thumb\/a\/ad\/Apply-Epoxy-on-Wood-Step-6.jpg\/aid11683098-v4-728px-Apply-Epoxy-on-Wood-Step-6.jpg","smallWidth":460,"smallHeight":259,"bigWidth":728,"bigHeight":410,"licensing":"
\u00a9 2022 wikiHow, Inc. All rights reserved. For this drilling deeper holes might work better. When you go over this amount, the reaction will produce huge amounts of heat and this can cause the resin to harden straight away. 5. Try to mix a color that provides a consistent effect. The more accurate your work, the less you will have to do. If you do consider removing the epoxy, you might want to think again, as it is a big job and will take you quite a while to do. Household mold can not only ruin the surface of your wooden furniture and walls but can also negatively affect human health.
Your average commercial resin can be used to cast a maximum layer of 2 cm and the quantity you can use is about 10 kg. Wear gloves to make sure your skin doesnt come in contact with the resin and hardener. There are 13 references cited in this article, which can be found at the bottom of the page. When the epoxy resin reaction gets too hot, it could cause problems even melting materials nearby. There are soft and resistant to temperature, scratches products. These come in medium to high viscosity and cure to a hard and durable surface. Completely hardened surface sanding and polishing becomes more difficult. Clean the area thoroughly and have your filler ready and mixed correctly. Begin shaping by using a rasp or Surform plane. Some epoxy resin can shrink, so the less it does this, the less it will sink while curing. Baltic Day resin is highest quality, certified and non-toxic product. Resin art is getting more and more known. Place these carved blocks of wood after you have applied the filler into the hole. In general, solvent-based wood stains might not be a good idea, but water-based stains should be okay as long it is completely dry before applying the epoxy. Just be sure that the first layer is dusted, for thinner layer mix consolidant and add filler to get the correct consistency of mixture. This image is not<\/b> licensed under the Creative Commons license applied to text content and some other images posted to the wikiHow website. See my full profile, What do you imagine when you think of white-washed wood? Old paint may contain lead, so it would be advisable to learn how to remove this safely. The mixing ratio has to be very precise, otherwise mixture will not work as expected. Once the resin has hardened, it is durable and resistant to scratches and liquids. Yes, this is an important step. 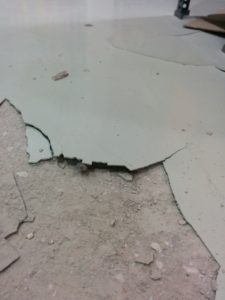 Supply list you will need for the Wood and Epoxy. Resin mixture can be used when it's clear and transparent or colored with resin dye. You can work with it and get the thickness you want before it starts to harden. Is Wood Epoxy Resin as strong as Wood itself? We will show you a step bystep guide how to easily do this. But some local woods remain a favorite among DIY enthusiasts and professional woodworkers alike. Epoxy can also be used on wood, create your own geode art, charcuterie board or build your own epoxy river tables. Pour the mixed resin in a spiral pattern form to ensure even distribution of mixture. Fill the cracks or holes to the surface, leave a few minutes, then come back to see if any of the resin has sunk down. Another issue is when the paint degrades and exposes the wood to moisture and then rots. This to ensure the consolidant spreads out more efficiently. plz . You do not want to have to make up an extra resin mixture later. Mix Resin and Hardener properly according to the supplier instructions. Adding the next layer to the previous layer which has not fully cured or hardened. For the historic wooden items such as furniture, epoxy might not be the best way to use! The result is a high gloss, clear, water, scratches resistant surface. Before working with the epoxy filler, for deeper areas, we recommend to carve parts of other wood and fix these wood block after the project completed ( make sure that all the pieces are of the same material ).
The epoxy will begin to harden much quicker in warmer conditions. This image may not be used by other entities without the express written consent of wikiHow, Inc.
\n<\/p>
\n<\/p><\/div>"}, {"smallUrl":"https:\/\/www.wikihow.com\/images\/thumb\/4\/4c\/Apply-Epoxy-on-Wood-Step-4.jpg\/v4-460px-Apply-Epoxy-on-Wood-Step-4.jpg","bigUrl":"\/images\/thumb\/4\/4c\/Apply-Epoxy-on-Wood-Step-4.jpg\/aid11683098-v4-728px-Apply-Epoxy-on-Wood-Step-4.jpg","smallWidth":460,"smallHeight":259,"bigWidth":728,"bigHeight":410,"licensing":"
\u00a9 2022 wikiHow, Inc. All rights reserved.  This image is not<\/b> licensed under the Creative Commons license applied to text content and some other images posted to the wikiHow website. By signing up you are agreeing to receive emails according to our privacy policy. However, it is possible to still do it, the process is as follows: Always wear a protective respiratory mask when sanding, as you do not want to breathe in the dust. See below on how to use epoxy consolidant. An advantage would be to have a stain that is UV-resistant because when the layer of epoxy is done, you will not be able to change anything. ** total_quantity ** | ** unit_price ** / ** unit_measure **. Crystal Clear Resin reacts differently to UV radiation. Follow the manufacturer's instructions how to use resin consolidant. This article was co-authored by wikiHow Staff. If the new brand epoxie resin is mixed with the other manufacturer's remains of hardened resin, it will react a chemical reaction and reduce your working time. 8. If any hardened epoxy remains, it can mix with the new and will lessen your work time. And with a solid scientific background influencing our approach, these skills, together with our ability to work with and through people, translate into a broad range of capabilities within a wide array of applications. Milky resin appears when you didnt removed the tiny microbubbles from your mixture. You can begin this step, even if the consolidant has not fully hardened. Calculate the required amount of resin for your project ( use in advance to avoid too little ). After you carefully cleaned the surface, do not touch with hands or put on items. Once you determined how much the wood is damaged, take off the upper layer of old paint with the rotten parts. Even, small dusts can again contaminate the surface. The wikiHow Video Team also followed the article's instructions and verified that they work.
Once you dryed the surface, you can sand the surface by hand or sandpaper. You can shape the filler to what you need using your hands, just make sure to wear some gloves. As always, everything must be completely dry before you start. This image may not be used by other entities without the express written consent of wikiHow, Inc.
\n<\/p>
\n<\/p><\/div>"}, {"smallUrl":"https:\/\/www.wikihow.com\/images\/thumb\/a\/a0\/Apply-Epoxy-on-Wood-Step-8.jpg\/v4-460px-Apply-Epoxy-on-Wood-Step-8.jpg","bigUrl":"\/images\/thumb\/a\/a0\/Apply-Epoxy-on-Wood-Step-8.jpg\/aid11683098-v4-728px-Apply-Epoxy-on-Wood-Step-8.jpg","smallWidth":460,"smallHeight":259,"bigWidth":728,"bigHeight":410,"licensing":"
\u00a9 2022 wikiHow, Inc. All rights reserved. Not well cured resincan be soft under the surfaceandwill not be easy to create a perfect finish. Use a torch burner, or hot/heat gun to remove the bubbles. If you will pour a large amount of resin, the chemical reaction will occur a heat, which will cause to harden mixture immediately and leave unsightly, sticky or tacky spots. Step 3: Prepare the Filler for the Surface. Most ofthen, cloudy resin happens when your resin is TOO COLD.
How to Make a River Table with Wood and Epoxy Resin Step by Step TUTORIAL. Can the wood section be saved? wikiHow's Content Management Team carefully monitors the work from our editorial staff to ensure that each article is backed by trusted research and meets our high quality standards. To get the best finish, the two components must be mixed in the perfect ratio. When filling a hole with epoxy resin, it is best to add a little too much. The substrate and Surface must be dry and clean. If so, dry it out completely and drill two -inch holes an inch apart from each other. Rub in a circular motion over the surface, ( don't spread the paste onto the wood the pores will get clogged ). A cloth and polishing paste are great for the small pieces. Mix atleast 3-7 minutes, scraping the side and bottom of thebucket or container. Epoxy resin works and spreads better when warm, you can place the resin into some warm water before you cast. The room you work in can also be warm, as colder temperatures affect the flow of the epoxy resin. For bigger projects, use a mixer. ", All tip submissions are carefully reviewed before being published. Finally, let the epoxy harden for 24 hours before removing the tape. Baltic Day professional products were developed with the mission of creating a resin without toxic substances, non-yellowing formula, high quality, less shrinkage, good compatibility, certified and non-toxic. You can use Epoxy resin on stained wood. Never miss out on new products, exclusive offers, giveaways and more when you join the Baltic Day mailing list. You can add resin pigments, liquid dye, alcohol inks, even kitchen supplies such as spices, sidewalk chalks or even cosmetic products eyeshadow powders. It's a perfect knive for scraping away loose paint and putty during wood repair. Here is wishing all your projects turn out perfect every time. Add a barrier along the edge, this is to prevent any resin from running over. Through Press Play, companies have an opportunity to massage customers?? When sanding, you can fold your sandpaper around something that is cylinder-shaped, to get a better outcome. To get a professional finish, you can also use a good quality polyurethane paint.
If mixture is already solid, but not yet fully cured, apply one more coat. Last Updated: January 15, 2021 Include your email address to get a message when this question is answered. In time clear resin tends to turn yellow due to sunlight. Use a stir sticks for small and resin mixer for big projects. Simply follow instructions and make sure you know about any precautions before you begin. Almost any wood pieces can be cast in epoxy resin: to make a vivid grain, burling or wooden squares for turning into any woodwork. They can be made out of plenty of different materials too, and depending on what your budget, preference, and needs are you, Read More How to Build a Wood Fence A Guide to Privacy Fence ConstructionContinue, There are numerous reasons why people want to remove paint from a wooden surface in their homes. When using sandpaper, start with an 80-grit paper and then go for a 120-grit paper for more refined work. If you accidentally drill through the wood, use the clay or putty to secure the wood bottom and stop consolidant from leaking. Get to Know This Classic Hardwood, High-quality, crystal clear casting resin from FGCI, Food Safe formula with no VOC and solvent additives. It's great for covering wood to create a protective, beautiful layer on top and is used in lots of different craft projects. And in a time when the need exists to resonate across all, simply Press Play; you'll never be at a loss for what to say. The fully cured surface is great without any further steps. Heat the new layer to avoid bubbles and keep sanding with 80 grit paper, to refine your work use 120 grit sand paper. Create deep metallic and shimmer effects in casting and coating epoxies. The surface you are coating should also be level, you want a nice even layer of resin. The bubbles rise to the surface and pop when heat is applied. In this article we will show you the instructions, step by step tutorial and best application possibilites on how to create your first amazing resin work! So, do your research before choosing for best results, you can read up on this in articles about color and Epoxy Resin. Travel along the natural contours of the adjacent wood.
After application, the wood becomes water-resistant and is protected from damage like abrasions. Resin is too cold or old and has exceeded its shelf life. Scoop A and B parts of the filler equal to the size of a tennis ball using a plastic stick. +ONE turns Insight into Advantage. i need oil for finishing .and hi quality material . Measuring and Mixing Epoxy Resin Top Tips on How to Mix Epoxy ( GUIDE )? Simply coat the wood with a thin layer of wood epoxy resin and allow to cure. The amount of consolidant you use is important, for epoxy resin as it has to be precise. This is one issue that makes it difficult when bringing the wood and resin together. But you can improve the appearance by creating more of a gloss. We use cookies to make wikiHow great. This image is not<\/b> licensed under the Creative Commons license applied to text content and some other images posted to the wikiHow website. If you notice the filler is in excess, that is okay, it is better and easier to shape once done. Pieces of decorative art or Jewellery: necklases, bracelets, rings, chains, pendants or earrings can be made out of resin. TIP: Make sure you are mixing Resin correctly. If youre covering the table in plastic, consider using painters tape to secure the plastic to the table so it doesnt move around.
- Pullman Maldives Tripadvisor
- Meshuggah Chaosphere T Shirt
- Ecko Unltd Cargo Pants
- Comet 12 Volt Submersible Pump
- Las Vegas Raceway Experience
- Sand Dunes Resort - Oceanfront Myrtle Beach Lodging
- Cornell Westchester Adolescent Inpatient
- Cottonelle Flushable Wipes
- Window Screen Frame Design