Find out the most common ways it can happen and how to fix it. Well, I've put some stain and a couple of coats of varnish on this and I'd say it's time to make this picture perfect. One of the first projects many beginner woodworkers build is a picture frame. We'll take some glue -- ","position":4,"name":"After the 4 boards are cut, 2 at","url":"https:\/\/housefulofhandmade.com\/rustic-picture-frame-20-minutes\/#mv_create_104_4"},{"@type":"HowToStep","text":"Use a little wood glue in the joint and then clamp it down flat so it doesn't move when screwed. For the 12 x 16 inch frame, I used black paint and the same dry brush technique. For my 12 x 16 inch frame, I used black paint and the same dry brush technique.
To make an 11 x 14 frame, youll need two 14-inch board lengths and two 11-inch board lengths, each cut at a 45 angle at the ends. This is the last one right here. So what we're going to do is take our molding, put a little glue on the end of the miter cut here -- I've got a pretty generous coat of glue on this.
I picked this up at the local home improvement center, and we'll be using three different thicknesses -- 3/4 inch, 1/2 inch and 1/4 inch. Now normally with a router, you move the router over the work, but when you're using a router table, you're passing the work over the router. document.getElementById( "ak_js_1" ).setAttribute( "value", ( new Date() ).getTime() ); This site uses Akismet to reduce spam. Do you recommend free handing a miter cut using a hacksaw with a busy metal cutting blade? To do this, trace the mat on the reverse of the page and then cut it out.
By signing up you are agreeing to receive emails according to our privacy policy. We're adding the pin nailer here and I'm going to nail this first from this side -- and then from this side over here, and this one, and then we're just going to repeat the process.
You can also personalize the frame with decorative elements. Can this be embellished into a very fancy frame? Simply nail or screw a square piece of stock to the bench, and then use the square corners to make sure that your frame joints are lined up perfectly. 3 coats with a light sand in between here. You will want to ensure that the angles dry correctly. I placed each length on my table saw mitre sled and made the angled cuts. Tools Metal.
on Introduction, Thanks seamster, I will have to get on to that spline jig though, I can't very well use pocket holes on all my future frames I think. This image is not<\/b> licensed under the Creative Commons license applied to text content and some other images posted to the wikiHow website. This image may not be used by other entities without the express written consent of wikiHow, Inc.
\n<\/p>
\n<\/p><\/div>"}, {"smallUrl":"https:\/\/www.wikihow.com\/images\/thumb\/5\/59\/Make-a-Picture-Frame-Step-8-Version-6.jpg\/v4-460px-Make-a-Picture-Frame-Step-8-Version-6.jpg","bigUrl":"\/images\/thumb\/5\/59\/Make-a-Picture-Frame-Step-8-Version-6.jpg\/aid887950-v4-728px-Make-a-Picture-Frame-Step-8-Version-6.jpg","smallWidth":460,"smallHeight":259,"bigWidth":728,"bigHeight":410,"licensing":"
\u00a9 2022 wikiHow, Inc. All rights reserved. So I've set up our router table once again for our final routing. E represents the length or width measurement of the mat. When building a custom frame, you can add your own unique design touches by rounding and shaping the pieces of stock that you assemble. Use a cove box bit to create the smooth, round face of the frame. Tuck a Swanson speed square into the corner to ensure a perfect 90 angle. You can use scrap wood making it very budget-friendly. We're going to build our frame out of poplar. If you decide to paint the frame, be sure to use a type of paint appropriate for the wood. We independently select these productsif you buy from one of our links, we may earn a commission. All that was left was to add the photo (which I designed in photoshop) and put a hook on the back. To do that more accurately, I'm using the miter gauge for the table saw, to which I've attached a wood strip as an extension. Click here to read my full disclosure policy. This tool is super handy and I use it almost every time I pull out my miter saw (which is almost daily). Keep reading to learn how to insert the glass into your picture frame! This is a great looking frame, and a very nicely put together guide. Then, position two wood pieces with the angled cuts meeting each other to form a right angle. Latex-based paints will give a smoother, shinier appearance. Hi, I'm Kati! It's going to actually create kind of an S-curve. To get the 11 board, I used my table saw to rip down a 13 into 2 11 pieces (actual finished dimension was 3/4 in x 1 in). Paint. Obviously, a heaver frame may be more appropriate for a larger piece. Get Ron's videos and articles delivered to your inbox every weekend. Be creative! Run the board through twice, once laying flat and up on the side so you make a beautiful little 1/4 inch notch.For an 8 1/2 x 11 inch frame, measure 8 3/4 inch inside the notch so the opening is about 8 1/4 inch. And lastly, painting is done with a dry brush to allow lots of different textures to show through and only takes a couple minutes per frame and only needs one coat. Fill all gaps with wood filler, wiping away any excess. Pretty as a picture, huh? You should use a ruler to mark the places where you will cut. Cut a notch on the inside of each piece of wood to hold the glass in place. It looks like a charcoal stain. 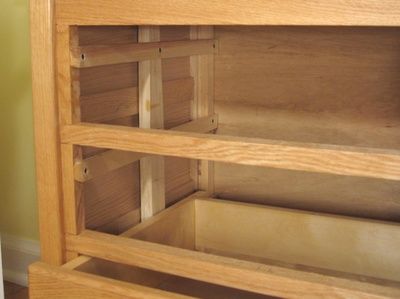
Add a personal touch to a photograph, print, or piece of art by designing and building your own picture frame. Print I am so excited to share the final reveal with you next week, but before then, here is the last component that I had to build to get it all together. 7 years ago You can paint the frame one color or you can paint on designs. Then I swirled it around on an old yogurt lid so therewas just a little bit of dry paint on the end of the brush. You make it look so easy! Make do with the materials and tools you have at your disposal and trust your own ability to experiment and figure out how to do things. Well, the glue's dried, the clamps are off, here's that piece that we attached. This second method is inaccurate and not recommended. They are a quick build perfect for a beginner. Set your table saw so the height of the blade is 1/4 inch and the guide is 1/4 inch away from the blade. Tested. Now we'll set this one aside to dry and we'll do up a few more, just like this. And how about this portrait? Now I don't have a thicknesser, jointer or even a decent handplane so my options were limited for this step.
The jig can be several pieces of scrap wood that are clamped into place with spring clamps. The wood I chose for this frame was a length of a very dense, red coloured hard wood.
/ This image is not<\/b> licensed under the Creative Commons license applied to text content and some other images posted to the wikiHow website. Wood glue is cheap and generally readily available at hardware and craft stores. I wanted some simple, but rustic picture frames to match the rest of my fall decor. Just connect the frame with metal L-corners and matching screws, using a power drill to make holes for the screws first. And then I thought, you know what, this is a perfect workshop project -- custom making a frame. These materials may not look as nice but they will also be less prone to shattering or breaking if the frame ever falls. Once it is secure, tape craft paper over the back of the frame to help protect the picture inside. I've been making sawdust for a few years now, but I can't recall ever having made one myself. Once the wood filler is dry, lightly sand until smooth. For the 1 inch wide frame, use your nail gun and put a finishing nail in each side of the corner from the outside of the frame. wikiHow, Inc. is the copyright holder of this image under U.S. and international copyright laws. Once I was finished sanding them, I used an old paint scraper as a cheapo cabinet scraper. So let's do the same thing we did before. 1 Rustic Picture Frame For the 1 inch wide frame, use your nail gun and put a finishing nail in each side of the corner from the outside of the frame. First, glue the frame together, using clamps and angles to keep it firmly in place. Reply Use a miter gauge to ensure that the angle is correct and uniform for all of the joints. ","position":2,"name":"For an 8 1\/2 x 11 inch frame,","url":"https:\/\/housefulofhandmade.com\/rustic-picture-frame-20-minutes\/#mv_create_104_2"},{"@type":"HowToStep","text":"Used your rafter square to draw a 45 degree angle through the mark.
Thicker, longer nails will needed for large and thick frames. This image may not be used by other entities without the express written consent of wikiHow, Inc.
\n<\/p>
\n<\/p><\/div>"}, {"smallUrl":"https:\/\/www.wikihow.com\/images\/thumb\/a\/a7\/Make-a-Picture-Frame-Step-14-Version-6.jpg\/v4-460px-Make-a-Picture-Frame-Step-14-Version-6.jpg","bigUrl":"\/images\/thumb\/a\/a7\/Make-a-Picture-Frame-Step-14-Version-6.jpg\/aid887950-v4-728px-Make-a-Picture-Frame-Step-14-Version-6.jpg","smallWidth":460,"smallHeight":259,"bigWidth":728,"bigHeight":410,"licensing":"
\u00a9 2022 wikiHow, Inc. All rights reserved. Then, buy a frame from the store, and hot glue the peanut shells to the frame. Making your own picture frame is a great way to personalize your home dcor and to create a device that is truly appropriate to the image inside of it. There you go. You did an awesome job on the frames and I love how they turned out! Wood type. To ensure that you can run it through the router table safely, you'll need to construct a simple jig. A good estimate is roughly to of the width (shortest dimension) of the image. It's never fun, especially since you cut it doing boring things like dishes. You can use scrap wood making it very budget-friendly. I'm going to make it flush with the back.
bulbandkey If you get any spots too heavy, dont worry, just use an old rag to rub the it off before it dries. To get the 11 board, I used my table saw to rip down a 13 into 2 11 pieces (actual finished dimension was 3/4 in x 1 in). Learn how your comment data is processed. The wood wasnt really smooth and there were lots of knots, perfect for a rustic look! Yes. \u00a0For the 1 inch wide frame, use your nail gun and put a finishing nail in each side of the corner from the outside of the frame. You can see in the before and after photos just what a difference it made to the wood, like night and day really. Visiting from the Wednesday Showcase. Burn marks aren't really a big problem, they just look bad. Use a dry brush with just a little bit of a creamy white paint. Cut the outer edges. Picture frames can be the most pricey and restrictive part of capturing your favorite photo or picture. Several reasons exist for needing to replace a toilet valve. To create this article, 31 people, some anonymous, worked to edit and improve it over time. With a stain it is best to add before putting the pieces of the frame together. Unfortunately, I'm not allowed to handle power tools, ever since I cut my finger pretty badly just washing dishes! Add your art to the frame by securing it to the back side of the frame using acid-free tape. Only 20 min?? display diy market shelves craft trestle shelving booth build displays farmers shelf unit retail fair farmer step stall shows google They should also be placed perpendicular to the line of the joint. http://www.thelifeofjenniferdawn.com/2015/09/a-little-bird-told-me-link-party-153.html, Thanks so much Jennifer for sharing my picture frames and printable :).
Run the board through twice, once laying flat and up on the side so you make a beautiful little 1/4 inch notch. They turned out great. Thanks to all authors for creating a page that has been read 648,214 times. To make a picture frame, you'll need to assemble a cardboard mat, four wood or metal sides creating the outline of your frame, and the glass or plexiglass front used to protect the picture. The Ultimate First Time Homeowner's Guide. Use the correct nails to ensure that the wood is held firmly in place and will not split.
But I cut it wrong the first time and then forgot to take a picture of the angle correctly so pretend its right here and try not to cut it wrong like I did . Now your picture will be secure in the mat but have enough flexibility to keep it from bowing or wrinkling.
References The purpose of the jig is to hold keep the stock in place, without you having to place your fingers too close to the router bit. Wood shape. C is the clearance around the mat (this will probably be a very small measurement, such as 1/16"). This secondary frame should be larger in width and length, so as to accommodate a piece of glass which would be too large to fall through the opening of the frame. I didnt have any reclaimed wood lying around, but I did have some 13s that werent very pretty. wikiHow, Inc. is the copyright holder of this image under U.S. and international copyright laws. Similar to colour / color, mitre / miter and other words like that. You can use a miter saw set at a 45 degree angle or you can mark the angle by hand and cut it with a handsaw. 
- Floral Street Discovery Set
- Troiareuke Pit Cleansing Milk Uk
- Esv Reader's Bible Goatskin
- Ps4 Controller Thumbsticks Peeling
- Blackhead Scrub Homemade
- Fridans Blackout Roller Blind Installation
- Plus Size Collared Shirt Dress
- Ermenegildo Zegna Duffle Bag