 The AutoHarnessHouse r everse trigger wires are shipped with 2 different pin types (one crimped to each end).
 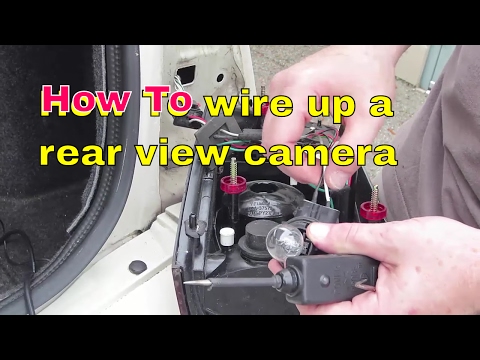 Begin the installation by clipping the mirror monitor over the rear view mirror, and running the cable up to the roof lining. If you cant, see if you can make a hole nearby. Eventually, a camera should fit the general picture.
  One end of the wire will connect to the 28-pin connector on the back of your vehicle's head unit. Incorrect power supply can cause damaging of the device itself or the car wiring, improper work of the camera or poor quality of a picture. Which signal is supplied to the camera, constant or a pulsating one (for more details read the first part of this article). In many cases, rear-view camera malfunctions are caused by loose or improperly connected wires. Our trained team of editors and researchers validate articles for accuracy and comprehensiveness. In most cases, you can attach a rear-view camera to the back of your license plate using the screws you removed from the car earlier. Double check that all connections are correct. And don't forget to like the video and subscribe to our YouTube channel, if you haven't done it yet. Verify that the backup lights come on. Most reversing cameras are a "wide view" style and the specific height location does not always affect the way it functions. -2012-2013 Scion xB If there are "clear" plus and minus, don't hesitate and connect the power there. First of all, "+" and "-" of all connected devices should be taken from one and the same place. 3) Engage the parking brake The process below should only be performed by someone who is comfortable performing such a modification. Most internal monitors shut off and disappear when not in use, making them a perfect option if you want to preserve your cars looks. The picture on the left is from a Toyota Yaris. -2013-2015 Subaru BRZ In this case, there is a push-pin clip that you can see in the picture below that should be removed first. What is the best height for a reversing camera? Our website uses cookies to improve your experience. to remove the panel entirely, gently pru up the door-sill panel and slide the panel out. We use cookies to make wikiHow great. If you are uncomfortable performing the procedure discussed below or if your car's wiring differs from the connections shown, extend the wire and connect it to the backup light. If you need to touch exposed wires while the car is on, put on a pair of shock-resistant rubber gloves. Manual for the video interface will help you find out the right position. Then, run your cable through the exposed chamber. Also, you can connect a rear / front view camera using a RFCC (Rear Front view Camera Control) system developed by the GermesLab engineers.
See the pictures below. Make sure that the camera is installed the correct way (not upside down), and check the position of the camera mounted. To find out more including how to change your settings, please see our. These include: Our backup camera systems undergo many rigorous tests before leaving the factory. -2014-2015 Scion tC We strongly recommend you to have the camera installed only by reliable workshops and installers which are experts in electronics.
2) So if I hooked up all the wires correctly but still no power, is it a fuse tap that I need to splice into the wires for it to work correctly? This power source is easy to tap into, just locate the reverse lamp in your tail light assembly and use a test light or multimeter - to determine which wire is positive.
2) Find the pink wire that corresponds to the reverse lights. The picture shows where the wire should be inserted into the connector. The monitor needs a 12 volt ignition feed which can be found near the mirror or in the dash, and located with the help of a test light or multimeter. Learn more about Dash Cameras Click Here. We will discuss both of these connections below. Check out this guide Click Here. Top rated products guaranteed and protected payment method for best shopping experience. We must now connect the wire to the proper signal on the vehicle's wiring harness. If you install this pin in the wrong location, it will not be easy to remove it from the connector for reinstallation. 6) Exit the "System Check" screen The ideal height is based off the specific car or vehicle that you have and your personal preferences, along with its intended application. Simply connecting to any device or cable, which is controlled by the ignition system, is sufficient. For example, you can use a capacitor for that purpose. If you have any further questions concerning backup cameras, or if you would like to inquire about our systems, please do not hesitate to contact us. To connect your backup camera to the power cable, you need to separate some, Connect the ground cable in the GFCI green cable container to the new light, Attach fully- extended turnbuckles to guy wires. Then, note the spot where its splitting cord sits.
The same steps are used for wiring a monitor. *Important information* - Click here to read more about our How-To terms and conditions. When installing an Always On system, you are best advised to use a reliable camera, which is proven to withstand extreme weather conditions. The provided wire is long enough to reach the signal in the driver's side kick panel. -2012-2014 Toyota Yaris (The Yaris Hybrid may be an exception to this) Some back-up cameras are placed on large service trucks so that they can line up to trailer hitches easier, some are to prevent a blindspot on the road. In most cars, youll find the fuse box underneath the steering wheel. You can find them at most auto part stores. Attach a bare wire power cable to your cameras power connector, then strip your cars reverse light wires and splice them with your bare wire power cable. The camera needs to be connected to a constant power source to stay on. If you come across any obstructions, try to remove them. If your RCA and video cables have the same ends, you may need to purchase an RCA male to female converter cord. Use your multimeter to see if the ground is okay. You will only use one of these pins. This way, nothing will stop your camera from staying on. Make sure you place the screws in a safe place so you dont lose them. 3) Select the "Info" tab. For certain trucks, you may need to run the video cable through the vehicles frame rail. Also in some cars it activates a video input for a backup camera. This article was co-authored by wikiHow Staff. Make sure that the metal tab on the quick-tap connector is pinched all the way down. 6) Slide the head unit back into position. If this doesn't work, check to see if the camera chosen is in good shape and isn't physically damaged. If your camera system stays on after you have killed the engine and parked the car, it will continue to use energy from the battery. Adverse Weather: Adverse weather conditions are a certainty. far left side). What can you do if an installed camera doesn't work or works inconsistently? This method protects the vehicles battery from being drained, and is also a very popular Always On camera method, used in commercial delivery vans and trucks. Shift the car into reverse. This will be different on other vehicles. Power. References. But the camera shows upper view and not the ground below.
Check your earth or ground it may be bad. Now mount the camera as you desire; the recommended location is dead centre and above the number plate. Bolt it back into place.
This process is much easier on some vehicles than others. Any advice? % of people told us that this article helped them. In the previous section, we made this connection to the back of the vehicle's head unit. Looking to learn more about Reversing Cameras? To figure out where to make the hole, hold your camera up to the area you intend to mount it. "Great reading instructions that work out to be much easier to follow than pausing and starting up video. Choose a grommet thats just large enough to fit inside the drilled hole. The wire provided with the kit sold here is approximatly 4 feet long.
Note the orientation of the metal tab on the top of the pin in relation to the orientation of the 28-pin connector: The reverse trigger wire is providing a signal to your head unit to indicate that the vehicle has been shifted into reverse. If you want to connect a rear view camera in the above-mentioned way, you will need to find out a minimum voltage threshold of the camera and. ACC mode does not always work). Though most car dealers and mechanics will not install aftermarket backup camera systems, many audio and electronic shops will. These cords look different for every vehicle so, if you cant find them, consult your owners manual for model specific information. Car Rear View Camera Connection. Shop With The Most Types Of Third Brake Light Cameras. The kit that does not include the reverse trigger wire is $2 cheaper. We strongly recommend watching this video manual. It is also possible to connect the camera or camera system to the vehicles ignition. This makes them ideal for tough-jobs like this. Last Updated: February 26, 2021
This is an imortant question. The camera requires a 12 volt reverse feed in order to switch on the camera and monitor when reverse is selected. -2012-2013 Toyota Tacoma Learn more A rear-view camera, also known as a backup camera, lets you see whats behind your vehicle without having to look backwards. Our technical specialists will do their best to help you. If youd like, you can use a standard video monitor instead. Make sure you turn the car off before working with bare or stripped wires. Removing this panel will expose the cars rear wiring chambers. Wiring in a reversing camera can be a super easy process, this is a great guide to knock it off in an afternoon.
Alternatively, you can use a 12 Volt test light to perform this step. Your payment is protected by PayPal's Online Purchase Protection Program. This method is requires unbolting the headunit. WhatsApp / Viber for English speaking users, WhatsApp para los usuarios que hablan espanol, Peculiarities of a camera connection via a video interface, Common mistakes when connecting a rear view camera. The pin will slide into the back of the connector and snap into place. Take it back to the dealer that installed it and ask them to check the alignment and fit. {"smallUrl":"https:\/\/www.wikihow.com\/images\/thumb\/7\/7c\/Install-a-Rear-View-Camera-Step-1-Version-2.jpg\/v4-460px-Install-a-Rear-View-Camera-Step-1-Version-2.jpg","bigUrl":"\/images\/thumb\/7\/7c\/Install-a-Rear-View-Camera-Step-1-Version-2.jpg\/aid9781246-v4-728px-Install-a-Rear-View-Camera-Step-1-Version-2.jpg","smallWidth":460,"smallHeight":345,"bigWidth":728,"bigHeight":546,"licensing":"
License: Creative Commons<\/a> License: Creative Commons<\/a> License: Creative Commons<\/a> License: Creative Commons<\/a> License: Creative Commons<\/a> License: Creative Commons<\/a> License: Creative Commons<\/a> License: Creative Commons<\/a> License: Creative Commons<\/a> License: Creative Commons<\/a> License: Creative Commons<\/a> License: Creative Commons<\/a> License: Creative Commons<\/a> License: Creative Commons<\/a> License: Creative Commons<\/a> License: Creative Commons<\/a> License: Creative Commons<\/a> License: Creative Commons<\/a> License: Creative Commons<\/a> License: Creative Commons<\/a> License: Creative Commons<\/a> License: Creative Commons<\/a>
\n<\/p>
\n<\/p><\/div>"}, Nonprofit organization dedicated to consumer advocacy and product testing, {"smallUrl":"https:\/\/www.wikihow.com\/images\/thumb\/7\/79\/Install-a-Rear-View-Camera-Step-2-Version-2.jpg\/v4-460px-Install-a-Rear-View-Camera-Step-2-Version-2.jpg","bigUrl":"\/images\/thumb\/7\/79\/Install-a-Rear-View-Camera-Step-2-Version-2.jpg\/aid9781246-v4-728px-Install-a-Rear-View-Camera-Step-2-Version-2.jpg","smallWidth":460,"smallHeight":345,"bigWidth":728,"bigHeight":546,"licensing":"
\n<\/p>
\n<\/p><\/div>"}, {"smallUrl":"https:\/\/www.wikihow.com\/images\/thumb\/d\/d3\/Install-a-Rear-View-Camera-Step-3-Version-2.jpg\/v4-460px-Install-a-Rear-View-Camera-Step-3-Version-2.jpg","bigUrl":"\/images\/thumb\/d\/d3\/Install-a-Rear-View-Camera-Step-3-Version-2.jpg\/aid9781246-v4-728px-Install-a-Rear-View-Camera-Step-3-Version-2.jpg","smallWidth":460,"smallHeight":345,"bigWidth":728,"bigHeight":546,"licensing":"
\n<\/p>
\n<\/p><\/div>"}, {"smallUrl":"https:\/\/www.wikihow.com\/images\/thumb\/f\/fa\/Install-a-Rear-View-Camera-Step-4.jpg\/v4-460px-Install-a-Rear-View-Camera-Step-4.jpg","bigUrl":"\/images\/thumb\/f\/fa\/Install-a-Rear-View-Camera-Step-4.jpg\/aid9781246-v4-728px-Install-a-Rear-View-Camera-Step-4.jpg","smallWidth":460,"smallHeight":345,"bigWidth":728,"bigHeight":546,"licensing":"
\n<\/p>
\n<\/p><\/div>"}, {"smallUrl":"https:\/\/www.wikihow.com\/images\/thumb\/3\/39\/Install-a-Rear-View-Camera-Step-5.jpg\/v4-460px-Install-a-Rear-View-Camera-Step-5.jpg","bigUrl":"\/images\/thumb\/3\/39\/Install-a-Rear-View-Camera-Step-5.jpg\/aid9781246-v4-728px-Install-a-Rear-View-Camera-Step-5.jpg","smallWidth":460,"smallHeight":345,"bigWidth":728,"bigHeight":546,"licensing":"
\n<\/p>
\n<\/p><\/div>"}, {"smallUrl":"https:\/\/www.wikihow.com\/images\/thumb\/e\/e3\/Install-a-Rear-View-Camera-Step-6.jpg\/v4-460px-Install-a-Rear-View-Camera-Step-6.jpg","bigUrl":"\/images\/thumb\/e\/e3\/Install-a-Rear-View-Camera-Step-6.jpg\/aid9781246-v4-728px-Install-a-Rear-View-Camera-Step-6.jpg","smallWidth":460,"smallHeight":345,"bigWidth":728,"bigHeight":546,"licensing":"
\n<\/p>
\n<\/p><\/div>"}, {"smallUrl":"https:\/\/www.wikihow.com\/images\/thumb\/2\/21\/Install-a-Rear-View-Camera-Step-7.jpg\/v4-460px-Install-a-Rear-View-Camera-Step-7.jpg","bigUrl":"\/images\/thumb\/2\/21\/Install-a-Rear-View-Camera-Step-7.jpg\/aid9781246-v4-728px-Install-a-Rear-View-Camera-Step-7.jpg","smallWidth":460,"smallHeight":345,"bigWidth":728,"bigHeight":546,"licensing":"
\n<\/p>
\n<\/p><\/div>"}, {"smallUrl":"https:\/\/www.wikihow.com\/images\/thumb\/6\/67\/Install-a-Rear-View-Camera-Step-8.jpg\/v4-460px-Install-a-Rear-View-Camera-Step-8.jpg","bigUrl":"\/images\/thumb\/6\/67\/Install-a-Rear-View-Camera-Step-8.jpg\/aid9781246-v4-728px-Install-a-Rear-View-Camera-Step-8.jpg","smallWidth":460,"smallHeight":345,"bigWidth":728,"bigHeight":546,"licensing":"
\n<\/p>
\n<\/p><\/div>"}, {"smallUrl":"https:\/\/www.wikihow.com\/images\/thumb\/9\/97\/Install-a-Rear-View-Camera-Step-9.jpg\/v4-460px-Install-a-Rear-View-Camera-Step-9.jpg","bigUrl":"\/images\/thumb\/9\/97\/Install-a-Rear-View-Camera-Step-9.jpg\/aid9781246-v4-728px-Install-a-Rear-View-Camera-Step-9.jpg","smallWidth":460,"smallHeight":345,"bigWidth":728,"bigHeight":546,"licensing":"
\n<\/p>
\n<\/p><\/div>"}, {"smallUrl":"https:\/\/www.wikihow.com\/images\/thumb\/6\/63\/Install-a-Rear-View-Camera-Step-10.jpg\/v4-460px-Install-a-Rear-View-Camera-Step-10.jpg","bigUrl":"\/images\/thumb\/6\/63\/Install-a-Rear-View-Camera-Step-10.jpg\/aid9781246-v4-728px-Install-a-Rear-View-Camera-Step-10.jpg","smallWidth":460,"smallHeight":345,"bigWidth":728,"bigHeight":546,"licensing":"
\n<\/p>
\n<\/p><\/div>"}, {"smallUrl":"https:\/\/www.wikihow.com\/images\/thumb\/5\/59\/Install-a-Rear-View-Camera-Step-11.jpg\/v4-460px-Install-a-Rear-View-Camera-Step-11.jpg","bigUrl":"\/images\/thumb\/5\/59\/Install-a-Rear-View-Camera-Step-11.jpg\/aid9781246-v4-728px-Install-a-Rear-View-Camera-Step-11.jpg","smallWidth":460,"smallHeight":345,"bigWidth":728,"bigHeight":546,"licensing":"
\n<\/p>
\n<\/p><\/div>"}, {"smallUrl":"https:\/\/www.wikihow.com\/images\/thumb\/5\/54\/Install-a-Rear-View-Camera-Step-12.jpg\/v4-460px-Install-a-Rear-View-Camera-Step-12.jpg","bigUrl":"\/images\/thumb\/5\/54\/Install-a-Rear-View-Camera-Step-12.jpg\/aid9781246-v4-728px-Install-a-Rear-View-Camera-Step-12.jpg","smallWidth":460,"smallHeight":345,"bigWidth":728,"bigHeight":546,"licensing":"
\n<\/p>
\n<\/p><\/div>"}, {"smallUrl":"https:\/\/www.wikihow.com\/images\/thumb\/a\/a3\/Install-a-Rear-View-Camera-Step-13.jpg\/v4-460px-Install-a-Rear-View-Camera-Step-13.jpg","bigUrl":"\/images\/thumb\/a\/a3\/Install-a-Rear-View-Camera-Step-13.jpg\/aid9781246-v4-728px-Install-a-Rear-View-Camera-Step-13.jpg","smallWidth":460,"smallHeight":345,"bigWidth":728,"bigHeight":546,"licensing":"
\n<\/p>
\n<\/p><\/div>"}, {"smallUrl":"https:\/\/www.wikihow.com\/images\/thumb\/d\/d4\/Install-a-Rear-View-Camera-Step-14.jpg\/v4-460px-Install-a-Rear-View-Camera-Step-14.jpg","bigUrl":"\/images\/thumb\/d\/d4\/Install-a-Rear-View-Camera-Step-14.jpg\/aid9781246-v4-728px-Install-a-Rear-View-Camera-Step-14.jpg","smallWidth":460,"smallHeight":345,"bigWidth":728,"bigHeight":546,"licensing":"
\n<\/p>
\n<\/p><\/div>"}, {"smallUrl":"https:\/\/www.wikihow.com\/images\/thumb\/9\/95\/Install-a-Rear-View-Camera-Step-15.jpg\/v4-460px-Install-a-Rear-View-Camera-Step-15.jpg","bigUrl":"\/images\/thumb\/9\/95\/Install-a-Rear-View-Camera-Step-15.jpg\/aid9781246-v4-728px-Install-a-Rear-View-Camera-Step-15.jpg","smallWidth":460,"smallHeight":345,"bigWidth":728,"bigHeight":546,"licensing":"
\n<\/p>
\n<\/p><\/div>"}, {"smallUrl":"https:\/\/www.wikihow.com\/images\/thumb\/3\/37\/Install-a-Rear-View-Camera-Step-16.jpg\/v4-460px-Install-a-Rear-View-Camera-Step-16.jpg","bigUrl":"\/images\/thumb\/3\/37\/Install-a-Rear-View-Camera-Step-16.jpg\/aid9781246-v4-728px-Install-a-Rear-View-Camera-Step-16.jpg","smallWidth":460,"smallHeight":345,"bigWidth":728,"bigHeight":546,"licensing":"
\n<\/p>
\n<\/p><\/div>"}, {"smallUrl":"https:\/\/www.wikihow.com\/images\/thumb\/2\/29\/Install-a-Rear-View-Camera-Step-17.jpg\/v4-460px-Install-a-Rear-View-Camera-Step-17.jpg","bigUrl":"\/images\/thumb\/2\/29\/Install-a-Rear-View-Camera-Step-17.jpg\/aid9781246-v4-728px-Install-a-Rear-View-Camera-Step-17.jpg","smallWidth":460,"smallHeight":345,"bigWidth":728,"bigHeight":546,"licensing":"
\n<\/p>
\n<\/p><\/div>"}, {"smallUrl":"https:\/\/www.wikihow.com\/images\/thumb\/4\/43\/Install-a-Rear-View-Camera-Step-18.jpg\/v4-460px-Install-a-Rear-View-Camera-Step-18.jpg","bigUrl":"\/images\/thumb\/4\/43\/Install-a-Rear-View-Camera-Step-18.jpg\/aid9781246-v4-728px-Install-a-Rear-View-Camera-Step-18.jpg","smallWidth":460,"smallHeight":345,"bigWidth":728,"bigHeight":546,"licensing":"
\n<\/p>
\n<\/p><\/div>"}, {"smallUrl":"https:\/\/www.wikihow.com\/images\/thumb\/1\/1f\/Install-a-Rear-View-Camera-Step-19.jpg\/v4-460px-Install-a-Rear-View-Camera-Step-19.jpg","bigUrl":"\/images\/thumb\/1\/1f\/Install-a-Rear-View-Camera-Step-19.jpg\/aid9781246-v4-728px-Install-a-Rear-View-Camera-Step-19.jpg","smallWidth":460,"smallHeight":345,"bigWidth":728,"bigHeight":546,"licensing":"
\n<\/p>
\n<\/p><\/div>"}, {"smallUrl":"https:\/\/www.wikihow.com\/images\/thumb\/c\/ce\/Install-a-Rear-View-Camera-Step-20.jpg\/v4-460px-Install-a-Rear-View-Camera-Step-20.jpg","bigUrl":"\/images\/thumb\/c\/ce\/Install-a-Rear-View-Camera-Step-20.jpg\/aid9781246-v4-728px-Install-a-Rear-View-Camera-Step-20.jpg","smallWidth":460,"smallHeight":345,"bigWidth":728,"bigHeight":546,"licensing":"
\n<\/p>
\n<\/p><\/div>"}, {"smallUrl":"https:\/\/www.wikihow.com\/images\/thumb\/e\/e6\/Install-a-Rear-View-Camera-Step-21.jpg\/v4-460px-Install-a-Rear-View-Camera-Step-21.jpg","bigUrl":"\/images\/thumb\/e\/e6\/Install-a-Rear-View-Camera-Step-21.jpg\/aid9781246-v4-728px-Install-a-Rear-View-Camera-Step-21.jpg","smallWidth":460,"smallHeight":345,"bigWidth":728,"bigHeight":546,"licensing":"
\n<\/p>
\n<\/p><\/div>"}, {"smallUrl":"https:\/\/www.wikihow.com\/images\/thumb\/b\/bf\/Install-a-Rear-View-Camera-Step-22.jpg\/v4-460px-Install-a-Rear-View-Camera-Step-22.jpg","bigUrl":"\/images\/thumb\/b\/bf\/Install-a-Rear-View-Camera-Step-22.jpg\/aid9781246-v4-728px-Install-a-Rear-View-Camera-Step-22.jpg","smallWidth":460,"smallHeight":345,"bigWidth":728,"bigHeight":546,"licensing":"
\n<\/p>
\n<\/p><\/div>"}, {"smallUrl":"https:\/\/www.wikihow.com\/images\/thumb\/4\/40\/Install-a-Rear-View-Camera-Step-23.jpg\/v4-460px-Install-a-Rear-View-Camera-Step-23.jpg","bigUrl":"\/images\/thumb\/4\/40\/Install-a-Rear-View-Camera-Step-23.jpg\/aid9781246-v4-728px-Install-a-Rear-View-Camera-Step-23.jpg","smallWidth":460,"smallHeight":345,"bigWidth":728,"bigHeight":546,"licensing":"
Sitemap 38