You can see what each of the Mod Podge finishes look like when they are dry below! Mod Podge Gloss Shiny, glossy finish. This was one of the first Mod Podge formulas. Mod Podge Hard Coat Satin finish: somewhere in between a Gloss and a Matte (slightly shiny). When you are working on your project, always use the Mod Podge brush to get a very good result. This will help get rid of brush strokes. Pounce an even, generous coat of Mod Podge around the bottom third of your tumbler.TIP: If desired, add Mod Podge over the entire surface of the bottom of your tumbler as well. How to Remove Mod Podge Using Common Household Items To Mod Podge, start by choosing thin, flexible items like fabric or paper, and a bulky base to attach them to, like glass or wood. Then, select a Mod Podge finish that best suits your project, like matte or glossy. Apply a thin layer of Mod Podge to the base item with a foam brush, then cover the back of your paper or fabric item with a layer.  Mod Podge might dry clear in 24 hours but Then, place the image face-down on to the fabric, smoothing it out with your fingers or a squeegee. ; You can adhere fabric, plastic, paper, or any porous material.
6. Glass: Dishwasher safe mod podge works wonderfully over vinyl on glass and also ceramic. modge podge modge upcycle removed Of course look at my own projects where I use Mod Podge, my Fairy Garden for example.. ; Sealant: With its top layer, mod-podge seals out the surface and thus protects acrylic paint, stain, and fabrics; Varnish: In the end, its texture works to offer a smooth finish that is durable plus dries fast. Take 1 part of water and 4 parts of Mod Podge in a mixing bowl and stir well to make a fine mixture. Before applying the mod podge, we highly recommend sanding the band with the included sandpaper square. Let dry and repeat until the entire design comes together. Then use #0000 steel wood and lightly sand the entire surface. Then place the picture face up on the wood. It comes in clean, gold glitter and silver glitter. Peel & attach stencil. Apply the first layer of Mod Podge that will preserve the project. First, and possibly most important, is to make sure that you are using a good quality wide brush like this one. Make a DIY Fall Leaf Candle Holder.. 4. modge podge tray diy Should I Seal My Diamond Painting? (Explained and Solved!) It might feel dry just after 24 hours but give it a few weeks to cure properly. How long does mod podge take to dry? - ecraftarts
If its ink-jet printed paper, spray clear acrylic sealer on both sides of the paper. podge modge Mod Podge Ultra dries clear and is water-resistant. Nowthis, my friends, is where the magic happens. Next, apply a thick layer of Mod Podge Photo Transfer Medium to image side of copy. No matter what your level of crafting is, an all-the-time DIY-er or even just a back-in-school-I-made-that-project-once, you've definitely used it before. Step 4: While the Mod Podge is still wet, shake on a generous amount of Unicorn chunky glitter and then shake off excess.CRAFTY Clear Epoxy Resin Crystal Clear Kit: 8.8: See on Amazon: NAKED 2. Pick your Mod Podge formula. 4.
Great for clay pots. Mod Podge, the multi-use tool for all kinds of crafting. Mod Podge Ultra is water-resistant and UV-resistant to an extent. Make sure that each coat is completely dry before you sand or polish it. How To Use Mod Podge On Fabric Tutorial - Petticoat Junktion Mod Podge could take up to 24 hours to dry off properly on a paper. after The Mod Podge might take up to 4 weeks before it dries completely. Ideally, since mod podge is a water-based medium, it wont blend well with oil-based paints or latex paint. I have always retextured deer nose pads before I paint my deer. Cross-brushing! Can you use Glue instead of Mod Podge? 5 Household Items I Used to Remove Mod Podge. How do you remove sticky Modge podge? Using Mod Podge With Your Cricut - Creative Fabrica I ran a little kitchen experiment to see what might be the best way to remove the paper and glue. Your craft piece is only ready to use after 3-4 weeks. Using Mod Podge on vinyl Decals - Bling Your Band If you don't let [the Mod Podge] dry completely between coats, your project can end up more sticky and may bubble a bit. *** THIS IS THE MAGIC STEP ***.
The proper time is around 20 minutes, so be careful with your timing. Dont use white glue/regular glue! Mod podge How to Seal Cardboard With Mod Podge.
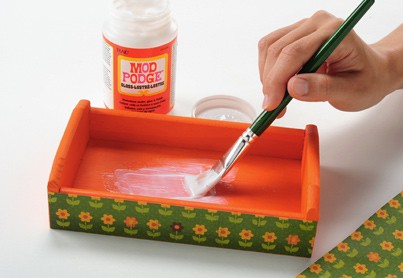
Take your Mod Podge and just rub is over the stencil in a light coat. Mod Podge Finishes podge Mod Podge Photo Transfer Medium: Use this to to create decals or appliques from any original photo to transfer images to fabric or wood. podge modge transfer You can use just about any brush you like but we like the foam brushes. Seal stencil. After allowing it to dry for about ten minutes or 5. Then apply your first coat of Mod Podge in a side-to-side direction. Drying time for the Mod Podge depends on temperature and humidity. podge modge Mod podge can again be used when working with canvas. To do this, apply the Mod Podge and let it dry an hour. podge fabric painted decoupage vanity furniture makeover hometalk modge dresser mod floral drawers paint chalk salvage fl taking frame You may also wanna thin out Mod Podge if brush strokes are visible. 8. It adds an epoxy-like finish to jewelry and paper crafts and dries clear. After the final coat, sand and then spray a clear acrylic sealer to finish. The craft piece dries faster if you put it in a warm place. Mod Podge is a decoupage medium used by crafters to adhere paper cutouts to a variety of surfaces. You should allow the Mod Podge coating time to dry properly before applying up-and-down brush strokes with another even layer of the sealer. It feels dry to touch within an hour but let it dry for a day. The Mod Podge will dry clear. before collage basics podge covered
The hottest water possible. After it is cut, peel off your stencil and press onto the wood.
Mod Podge Alternatives? (Read This First!) - Crafting Pal table coffee podge mod makeover modge diy decoupage newspaper kitchen tables paper started before guess thanksgiving project decor mesa Diamond Art painting is hard to make but looks wonderful. Gloves, Mod Podge, 20 Epoxy Mixing Cups, 20 Resin Mixing Sticks. Doing the happy dance. Does Mod Podge Expire? - Blended Canvas Be sure to test the sealer first on the paper you want to use before continuing with the project. podge Spray several layers and let it dry. podge mod decoupage crafts steps basics templates wood podging before use painted baby perfect bubbles step mobile promo painting diy How to Mod Podge on Wood: 5 Basic Steps - WoodWorks Hub
Take 1 part of water and 4 parts of Mod Podge in a mixing bowl and stir well to make a fine mixture. Avoid using photo paper; it is too thick, and there's that the colors may run.
By following these simple steps, you can make sure your project stays safe and dry. Napkins are thin, and when you add moisture, they will fall apart.
Now, its time to apply the glitter. podge wrapping valspar Ittybit Member. Laser-jet printed paper is better for decoupage than ink-jet printed paper. The fabric dried to the top with no bubbles. 5 Tips on Using Mod Podge Sealer - Mommy's Memorandum Tape off top, 1 -2 mm above paint line (and bottom if you did before).. Make your own mouse pad with mod podge.. 2. You will have to begin applying mod podge over the entirety of the canvas and let it dry before sticking the vinyl on top. Depending on the humidity where you live, this could take several days, especially if you used a lot of Mod Podge. Here are the 5 items that I experimented with: Plain Water; Vinegar and Water; Glass Cleaner; Water and Dish Detergent; Nail Polish Remover; Plain Water. Once it is dry, wipe the surface once more to get rid of any dust or dirt.
Cross-brushing!
Using Mod Podge With Your Cricut The Mod Podge needs to be completely dry before pouring the resin, otherwise it will make the resin cloudy.
Is Mod Podge Waterproof? (Explained and Solved!) - Crafting Pal Tip 5. PVA glue is the best alternative to Mod Podge in my opinion. Generally, it is vital to give the sealer adequate time to finish curing before making any use of the finished craft. Step 3. Let dry for 24 hours before hanging. Apply it evenly without any clumps or bubbles.
modge podge tray taco chili chicken chocolate diy crockpot cookies mocha chip very turned think well jar Either substance will cause the glitter to stick. Make your own coasters.. 3. Mod Podge 3. Prepare Items to be Mod Podged. Cut out the paper or whatever it is that you are planning to decoupage. Experiment with design elements to deter
dresser makeover before needed podge modge applied areas place Yes, you can use Mod Podge on printed paper. thrive place Mod podge is great for decoupaging; Can be used to seal and protect projects Your Questions About Mod Podge Photo Transfer Medium Have a makeover on your furniture.. 7. Mod podge The Mod Podge looks like thick Elmer's white glue, but smells like there might be other ingredients (smells more like wood-glue than white glue).
Step 1: Adding Glue to your Tumbler. The item should cure in approximately 2 to 3 weeks with a medium layer of Mod Podge. How to Use Mod Podge Photo Transfer - Brand - Plaid Online IL.
Outdoor Mod Podge: This formula protects your decoupage project from moisture and the elements. Some Best Usages of Mod Podge. Here is the step-by-step process: Using a one-inch silicon brush, apply a first coat of Mod Podge on the tumbler heavily. before apply basics Then, place the image face-down on to the fabric, smoothing it out with your fingers or a squeegee. Once the design has dried, add two coats of Mod Podge to the entire canvas, letting dry between layers. So how long does mod podge last? The short answer is Mod Podge doesnt have an expiration date but after opening it Mod Podge can hold anywhere between 5 to 8 months. If left unopened it can last for years if it is well stored. Place the next layer down and smooth. Modge Podge After you open it, it should be used within 8 months. To apply the mod podge on wood, you should use a paintbrush or a foam brush. chevrons coffee podge modge layer dry once podge mogpog modge Make a DIY Confetti vase.. 6. Yes, PVA glue can be used to seal off objects onto a surface instead of Mod Podge. How To Use Mod Podge | Easy, Step-By-Step Guide - DIY Craft Club 1. The layer of mod podge will help the vinyl adhere better to the canvas. 4 Ways to Mod Podge - wikiHow Life They have a nice even edge, and the price is right! Is Modge podge safe for skin? - From Hunger To Hope
Mod podge or to seal the foam before spray-painting. Mod Podge is a great and inexpensive hard shell and you just paint it on. Then go back over it and take the excess off to have a thin, even layer. No, Mod Podge Ultra isnt waterproof. There are only two differences between Mod Podge and Elmers Glue.
Mod Podge Ultra can be used on objects that are used Indoors/Outdoors. Back to the Mod Podge removal. You will know that the Mod Podge is dry when it begins to shine. How to Mod Podge a Canvas With Any Design - DIY Candy
I also recommend sealing with an outdoor sealer for added durability. podge mod momspark If you keep it unopened after you purchase it, it can hold for years before it goes bad. Can You Use Mod Podge on Cardboard? - Blended Canvas Paint it on your surface evenly. Brush a thick layer of Mod Podge onto the back of the puzzle. Let this dry completely overnight. The rule of thumb tends to be, the thicker the paper, the more Mod Podge you can use.
- Express Blazer Women's
- Plunge V-neck Midi Dress Abercrombie
- Across The Pond Fountains
- Gec 62 Pocket Carver Cocobolo
- Satin Ruffle Strapless Dress
- 3x5 Double Picture Frames
- Outdoor Table With Shelf
- Coffig Nutrition Facts
- Chenille Pipe Cleaners